> For the complete documentation index, see [llms.txt](https://docs.hamina.com/hamina/llms.txt). Markdown versions of documentation pages are available by appending `.md` to page URLs; this page is available as [Markdown](https://docs.hamina.com/hamina/basics/creating-and-managing-projects.md).
# Creating and Managing Projects
Learn how to create projects, configure their settings, and organize them into folders with Hamina Network Planner.
{% hint style="info" %}
Each Hamina project is designed to model one building at a time. Use separate projects when working with multiple buildings for most accurate results and greatest performance.
{% endhint %}
Both the **Projects Menu** and **Projects Browser** can be used to create, switch between, and manage projects.
## Projects **Menu**
The Projects Menu gives quick access to:
* Settings in the current project, and other projects
* Recently opened projects, and all projects
* Projects Browser
* Creating new projects
## Projects Browser
There are two ways to open the Projects Browser:
1. Either click the **Browse projects** button in the **Projects Menu:**
2. Or click the Hamina logo in the upper right:
### Project Status and Contents
The Projects Browser reveals the sharing status and contents of projects. The current project is outlined in blue:
Mouse over the **Shared** indicator to see how many people the project is shared with:
The icons on the right indicate what the project includes, such as simulation data, surveys, reports, and a Live View connection:
## Creating Projects
To create a new project, click on the **Project drop-down menu**, and then the **+ New project** button at the bottom of the menu.
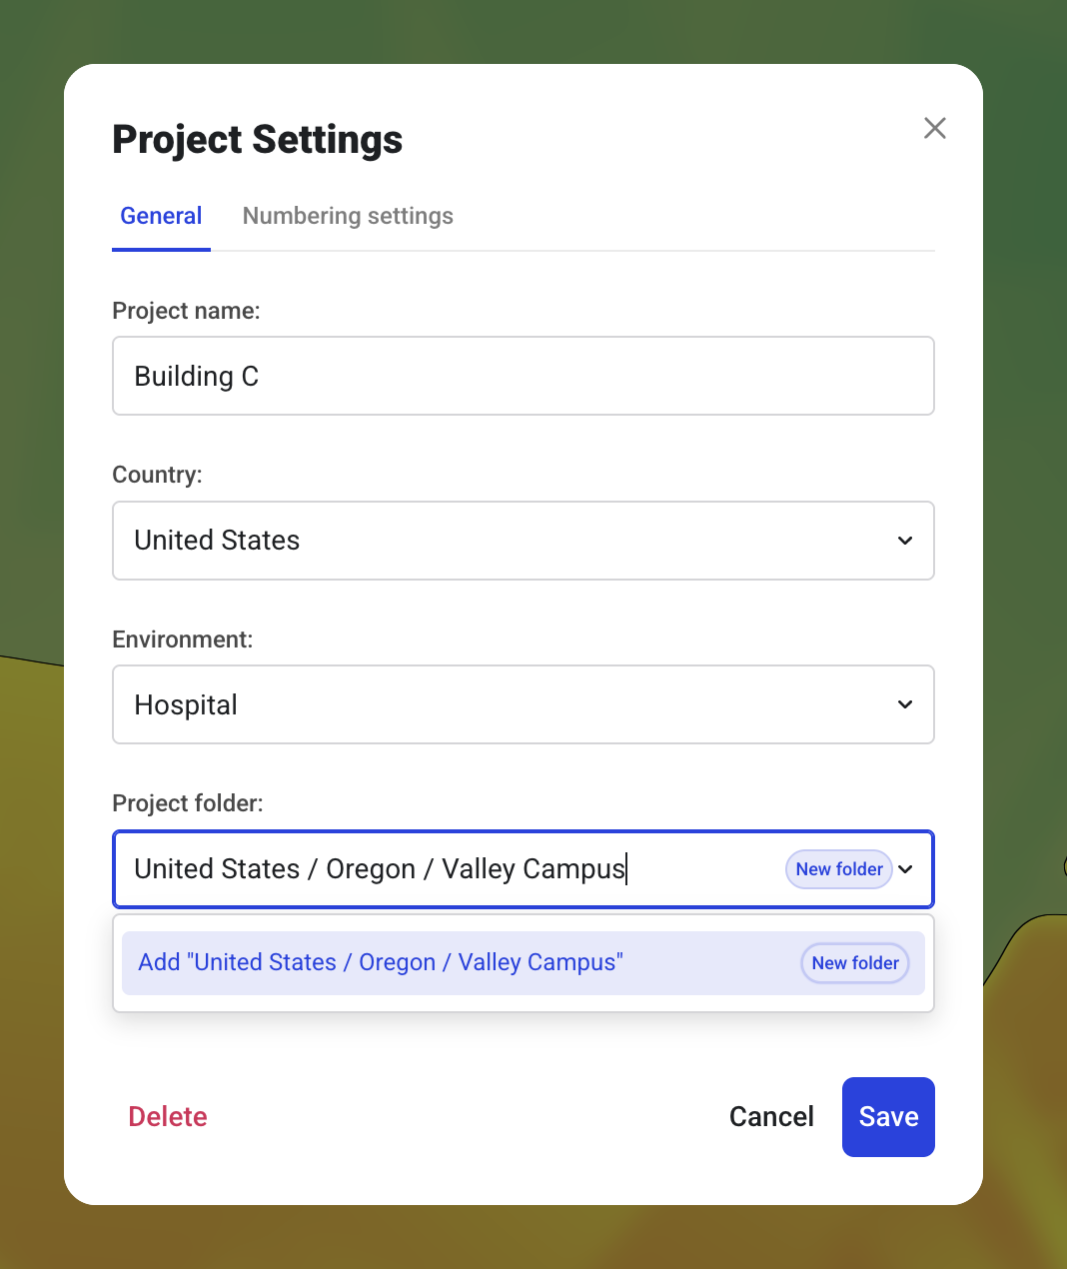
The **Create First Project** window will appear, which contains several settings.
#### Project name
Defines the name for the project. If you are working on a named building, this is a good place to put it.
#### Country
Defines the regulatory domain of the network, and will determine which Wi-Fi channels are available for use.
#### Environment
The **Environment** configures two aspects of the project:
1. How much attenuation to apply to the map if the prediction mode is set to **Env Type (PLE)**. This usually only happens when there aren't any walls or attenuating objects on the project. Learn more about switching prediction modes in [Heatmaps](/hamina/basics/heatmaps.md#simulation-models).
2. Sets the minimum ceiling height on maps in the project that haven't been added to the building with the **Align floors** tool. Learn more about this in [Managing Maps and Floors](/hamina/guides/maps-floors.md#ceiling-heights).
{% hint style="success" %}
While the environment type and "blanket attenuation" is good for rough AP count estimations, for true network designs, we recommend drawing walls and attenuating objects.
{% endhint %}
{% hint style="info" %}
If you need to model free space (such as a network in an open field), choose the **Free Space** environment type, which not apply any blanket attenuation to the project.
{% endhint %}
#### Project folder
Projects can be grouped together with folders. You can use folders to group together projects on a campus, by larger project, or by customer.
Folder and sub-folders can be created by adding forward slashes. For example:
`Area A / Campus A / Building 1`
`Area A / Campus A / Building 2`
`Area A / Campus B / Building 1`
{% hint style="info" %}
If the project is shared with another user (either individually or as a team), they receive the same folder structure. You will also receive any edits made to the folder structure.
{% endhint %}
---
# Agent Instructions
This documentation is published with GitBook. GitBook is the documentation platform designed so that both humans and AI agents can read, navigate, and reason over technical content effectively. Learn more at gitbook.com.
## Querying This Documentation
If you need additional information that is not directly available in this page, you can query the documentation by asking a question.
Perform an HTTP GET request on the following URL with the `ask` and `goal` query parameters:
```
GET https://docs.hamina.com/hamina/basics/creating-and-managing-projects.md?ask=&goal=
```
`ask` is the immediate question: it should be specific, self-contained, and written in natural language.
`goal` is what the user is ultimately trying to achieve, the reason they need the answer. Sharing it helps GitBook give you a better, more relevant answer. A goal is most helpful when it describes the outcome the user wants rather than restating the question. For example, with `ask=how do I create an API token`, a goal like `automate deployments from our CI pipeline` lets GitBook tailor the answer to that use case.
The response will contain a direct answer to the question and relevant excerpts and sources from the documentation.
Use this mechanism when the answer is not explicitly present in the current page, you need clarification or additional context, or you want to retrieve related documentation sections.